
When designing your Shopify store, utilizing unique custom fonts that are not offered in Shopify’s font library can allow you to distinguish your store from the rest. While learning how to add custom fonts to Shopify may seem daunting, this guide will walk you step-by-step through the process of obtaining and adding custom fonts to your Shopify store.
Step 1: Obtain Your Custom Fonts

The first step to adding custom fonts to your Shopify store is to find and purchase your desired custom font. You may choose to download your font from a third-party provider like Google Fonts or Typekit. Ensure you download it in specific font types such as WOFF or WOFF2.
Next, navigate from your Shopify dashboard to ‘Online Store’ > ‘Themes’ > ‘Actions’ button > ‘Edit code.’
Step 2: Upload Your Custom Font Files
You should now be facing your Shopify theme code editor.
In the left-hand menu, scroll down to the ‘Assets’ folder. Click to open it, and click ‘Add a new asset.’

A small dialog box will appear. Click the ‘Add File’ button and select your desired custom font files. Since you can only add one new asset at a time, you will need to do this multiple times if you are uploading multiple files. Once finished, click ‘Done’ to upload your custom font files.
Next, return to your Shopify theme code editor and navigate to ‘Content’ > ‘Files.’
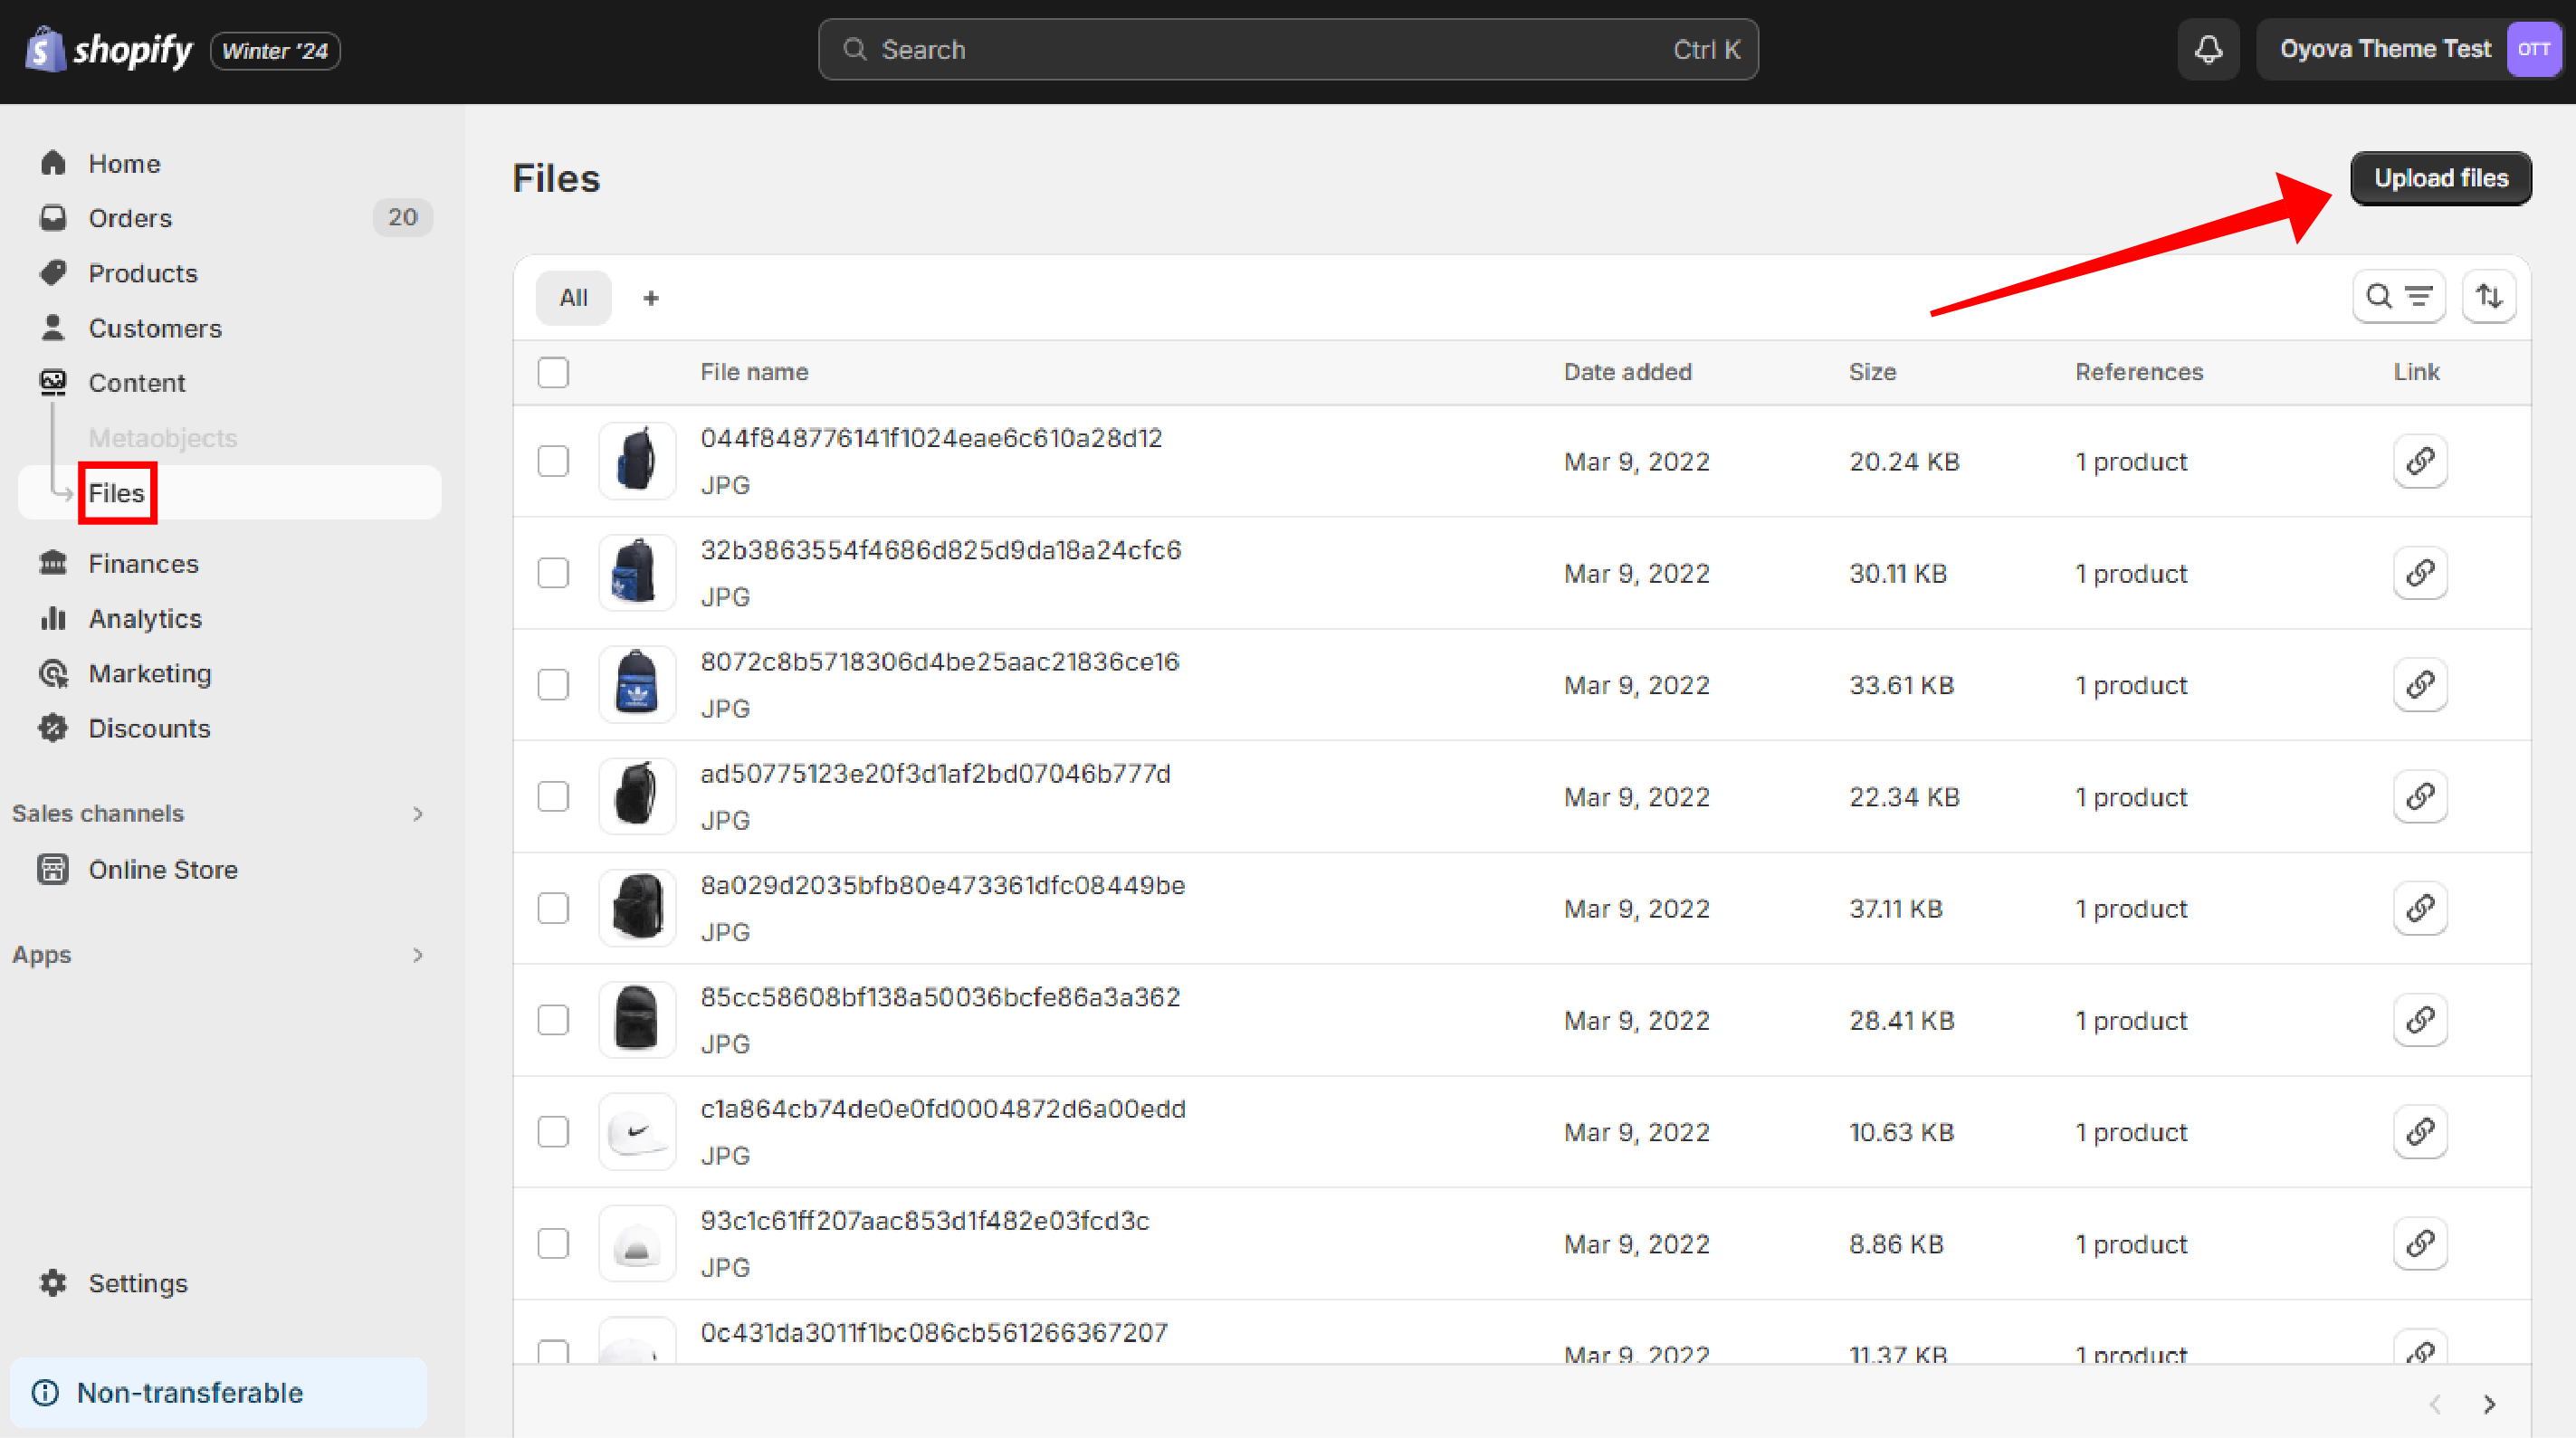
Select ‘Upload files’ and upload here the same custom font files you uploaded to your Assets folder.
Then, copy and save the links for each of your uploaded font files to be used again later. Click on each file’s corresponding link button to save its link.
Step 3: Input and Update Your Specific Font Code
Returning to your Shopify theme code editor, navigate to your ‘Layout’ folder and open ‘theme.liquid.’
Between the two groups of code beginning with ‘body’ and ‘@media screen’ within the ‘<head>’ tag, create adequate space and paste this specific code:
@font-face {
font-family: ‘FONT’;
src: url([Insert font asset url here]) format(‘woff’),
url([Insert font asset url here]) format(‘woff2’);
}
This code is a template of sorts that you will need to edit to match the font file type(s) you uploaded.
Depending on what file type(s) you have uploaded, you will likely need to remove certain lines of code from the code you pasted. For instance, if you are not uploading a WOFF2 file, remove the WOFF2 line completely.

Inside your pasted code, replace the word “FONT” in all caps with the exact name of your custom font as it appears in your Assets folder. Also replace any instances of ‘[insert font asset url here]’ with their respective links that you copied in Step 2. Ensure each link is correctly matched to its corresponding file type.
When finished, click ‘Save’ to save your changes.
Step 4: Apply Your Custom Font
Now, it is time to input the code that will apply your custom font to your desired texts. Below you will find specific instructions on how to apply your custom font to your online store’s headers and body text.
Headers
To apply your custom font to your headers, navigate to ‘Assets’ > ‘base.css’ (it may be ‘theme.liquid.scss’ for you). Click anywhere in the code, hit Ctrl+f, and search for ‘h1’. You should come across a row of code like this:

These pieces of code are responsible for the appearance of your store’s headers. To have them use your custom font, replace the code segment “var(–font-heading-style);” following “font-family:” with this specific code:
‘FONT’ !important;
Again, make sure to replace the word “FONT” with the exact name of your custom font.
Body Text
If you wish to apply your custom font to your body text, navigate back to ‘Layout’ > ‘theme.liquid’ and find the ‘body’ chunk of code that you pasted code under in Step 3.

Replace the code segment “var(–font-body-family);” following “font-family:” with this specific code:
‘FONT’ !important;
Replace the word “FONT” with the exact name of your custom font.
Step 5: Save Your Changes
Once you have finished adding and editing your code, be sure to click ‘Save’ to save your changes.
If you wish to upload multiple custom fonts, you will need to repeat steps 1-3 for each one.
Personalize and Optimize Your Shopify Store with Oyova
You have now learned how to add custom fonts to Shopify, bestowing it with a unique stylistic personality that will stick with your customers and have them coming back for more. If you’re looking to upgrade your eCommerce store even further, consider partnering with Oyova.
Allow Oyova’s team of digital marketing experts to do the heavy lifting with our specialized Shopify development services and web development services, suited to meet your specific needs – no matter how big or small. Let us transform your online store into an eCommerce powerhouse that is primed to excel both stylistically and functionally.
Contact Oyova today to see how our team of professionals can take your online store to the next level.
Related Posts

Shopify SEO Checklist for 2026: Technical Fixes That Help Stores Rank
Shopify makes it easier to launch and manage an online store, but it does not handle every SEO...
Read More
How Much Does the Average Shopify Store Make per Month?
The average Shopify store can make anywhere from a few hundred dollars to $10,000+ per month, depending on...
Read MoreWhat Are the Essential Shopify Apps Every Store Needs?
Running a Shopify store can feel like juggling ten things at once. Your time is stretched thin between...
Read MoreOur Awards